Building with map elements at runtime
Clik here to view.

By: Jordy Isaac
With our the Maps SDK for Unity 2.0, we’re making it easier for developers to let gameplay dictate how the map responds. With our new comprehensive APIs that allow developers to change map elements at runtime, you can now use the Editor for fast iterations while building and see quick visualizations of UI changes.
In previous versions of the SDK, developers had to reload the map in order to render changes. Now, with runtime editing, you can switch between different themes depending on the game state, change building materials, turn layers on or off for better visualization, and more. You now have total control and a more performant way to control the map’s look and feel. Using the API to change the map based on the action of players allows for a compelling and fun gaming experience.
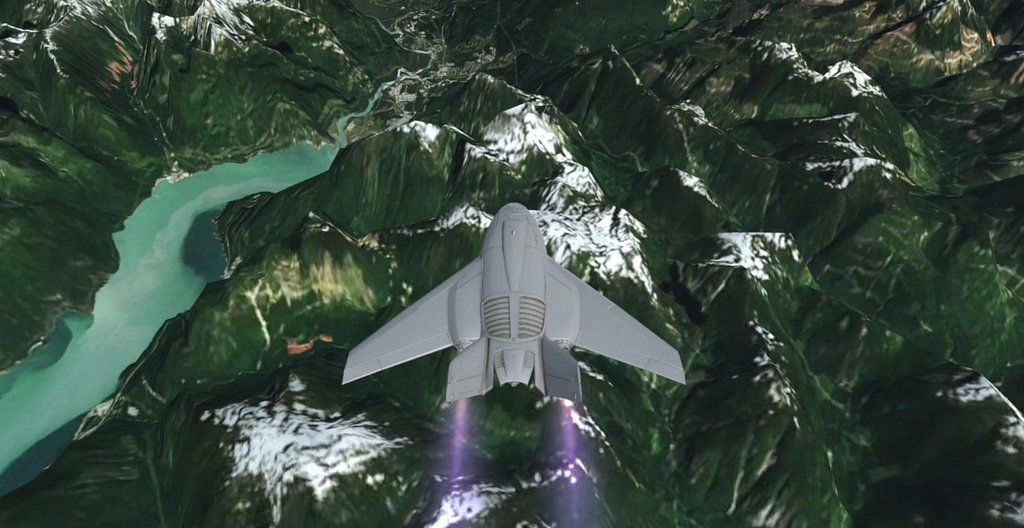
To see this in action, I built the example below. The demo features a plane flying over Vancouver B.C., and a button which when pressed calls a function that changes the map style back and forth between Mapbox Satellite and Mapbox Dark styles. This is done at runtime without having to reload the map. Want to build it yourself? Follow the walkthrough below.
How I built it:
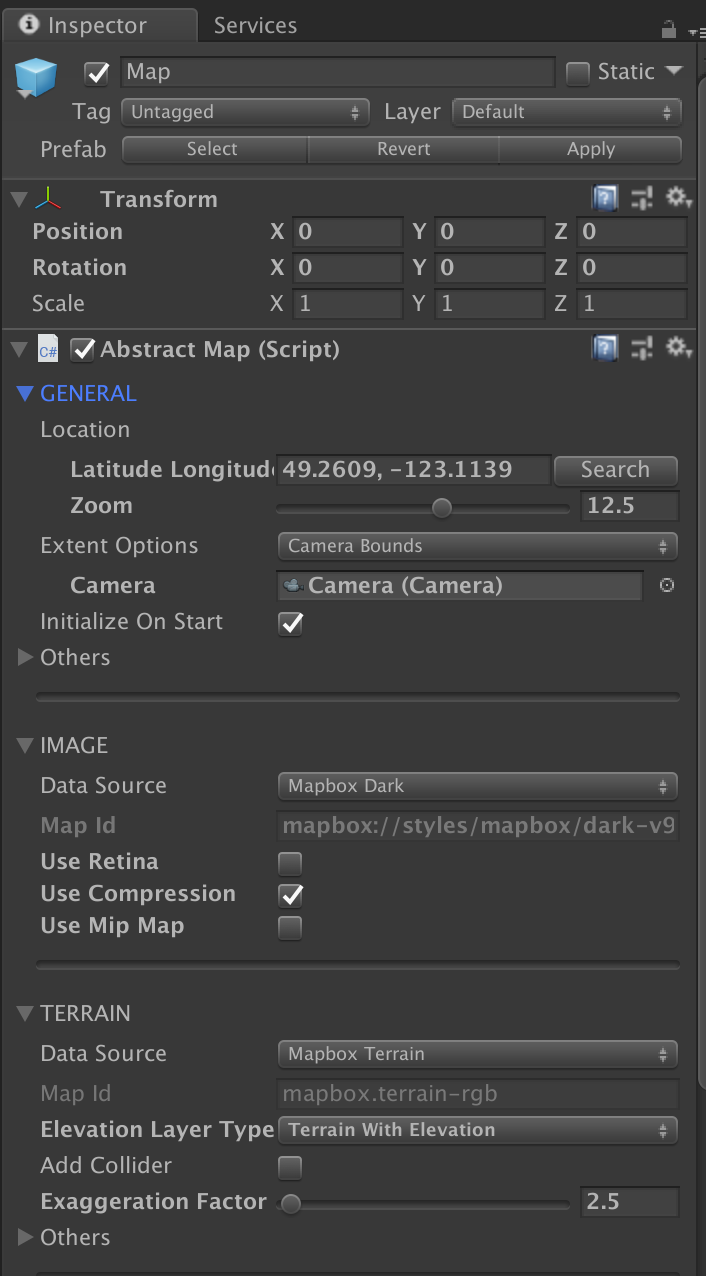
I started out by creating a map with the Maps SDK for Unity. To do this, drag the Map prefab into the scene. Next, I configured the settings of the AbstractMap script.
Clik here to view.

Then, I added the plane GameObject to the scene. I used an airplane model that is provided in the Unity Standard Assets package, but any 3D models would work. I set the Y position of the model to be 250. This can be changed depending on what altitude you would like your plane to fly. Next, I made the Main Camera a child of the Plane game object.
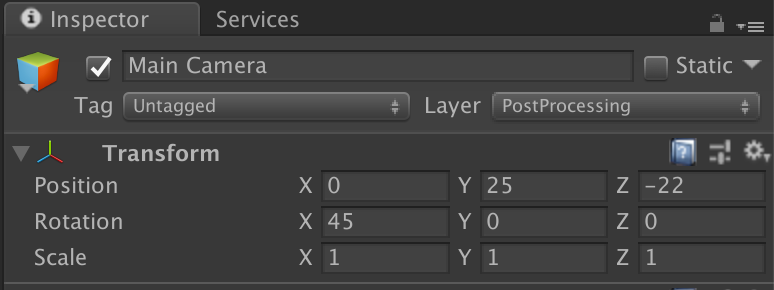
I then offset the Main Camera so that the plane is positioned correctly in our field of view. You can adjust this to whatever feels right for your scene.
Clik here to view.

At this point, the plane flies over Vancouver. The next step is to implement a UI button, and a script to handle the tasks of calling SetLayerSource() and changing the button text. To do so, I wrote the class below called ToggleStyle.cs and attached it to the Map GameObject.
Once the script is attached to the Map, I assigned it to a button and configured the OnClick event to call ToggleStyle.ChangeImagery when the button is clicked. When this function is called, it changes the map image style, changes the button text, and changes the state of the boolean tracking which style is active.
Clik here to view.

This is just one small example of what you can do with runtime styling. Update to version 2.0 and start building.
Image may be NSFW.Clik here to view.
Let play drive your game styling was originally published in Points of interest on Medium, where people are continuing the conversation by highlighting and responding to this story.