Well-placed labels can be the difference between a sloppy map and a beautiful one. Labels need to clearly identify features without obscuring the map.
The normal requirements for map labelling are to place labels as clearly as possible without any overlap. Regular maps just need to avoid label overlap for a single, fixed zoom level and rotation.
Good label placement is a hard problem that we solve for Mapbox GL. We need our label placements to work at any zoom and any rotation. We need labels placements to be continuous, so that labels don’t jump around when zooming or rotating. We need labels to be seamless across tiles. We need to support changing font sizes as you zoom. And it all needs to be fast.
Placement needs to support both horizontal labels, as well as curved labels which follow a line. Both types of labels need to behave smoothly when zooming and rotating. Labels can never overlap, even when rotating. Horizontal labels stay horizontal and curved labels rotate with the map. Labels are flipped to avoid being drawn upside down and curved labels smoothly slide along roads.
There is plenty of academic research on label placement, but most of this applies to maps with fixed rotation and with separate zoom levels. Dynamic maps with continuous zooming, panning, and rotation need a completely different approach. Our implementation expands on a paper by Been and Yap that establishes four ideal requirements for continuous and interactive labelling:
- Labels should not disappear when zooming in or appear when zooming out.
- Labels should not disappear or appear when panning except when sliding out of view.
- Labels should not jump around, but instead should be anchored.
- Label placement should be deterministic, no matter how you got to the current view.
The paper provides guidance on implementing this for horizontal labels, but we go further by supporting rotation and curved labels.
Our implementation has two steps:
- Preprocessing
- Rendering
The rendering step needs to be fast so that Mapbox GL can rerender the entire map every frame for smooth interaction. Most of the placement work happens in the preprocessing step:
- Generate anchor points for each label.
- Calculate the positions of individual glyphs relative to the anchors.
- Calculate the zoom levels at which the labels and glyphs can be shown without overlap.
- Calculate the rotation range in which the label can be shown.
Generating anchor points
Each label has an anchor. An anchor is the point at which a label is positioned when zooming or rotating.
Labels for point features have a single anchor, the point.
For lines, we want to show multiple labels so we interpolate along the line adding an anchor every x pixels. Distance between labels changes when zooming, so we add a minimum zoom level for each anchor to maintain appropriate spacing. Fewer labels are shown at lower zoom levels and more appear as you zoom in.

Generating positioned glyphs for each anchor
For each piece of text we already have a list of glyphs and their positions, but these positions need to be adjusted for curved labels.
During the render step we can only shift glyphs along a straight line. To draw curved text we need to add multiple copies of glyphs — one for each line segment a glyph appears on. Each of these glyphs have minimum and maximum zoom levels that hide the glyph when it slides off the end of a segment so that only one instance of each original glyph is shown at the same time.
Usually these glyphs are completely hidden when out of range, but here they are shown with a reduced opacity:

Restricting the zoom range
To avoid label collisions, we need to restrict the zoom level at which a label is first shown. As you zoom in, labels get spaced further apart, opening room for new labels. Once a label is shown, it will not be hidden as you zoom in.
We use an R-tree that contains already-placed labels to narrow down which labels might collide. We then calculate the zoom level at which the two labels will fit side-by-side. It is safe to show the label for any zoom level higher than this one.
Restricting the rotation range
The next step is calculating how far the label can be rotated before it collides with other labels. There are two types of collisions: a curved label colliding with a horizontal label, and a horizontal label colliding with a horizontal label.
Horizontal-horizontal collision
There are eight possible angles at which a pair of horizontal labels could collide. Each of these possible collisions is checked with some trigonometry.

Curved-horizontal rotational collisions
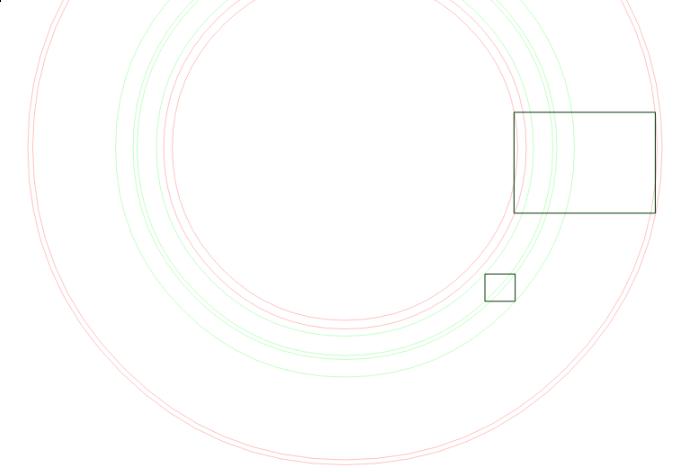
A curved-horizontal collision occurs when a corner of one label’s bounding box intersects an edge of the other label’s bounding box. For each of the eight bounding box corners, we calculate the angles at which a circle (formed by that point being rotated around the label’s anchor) intersects the edges of the other box. These are the angles at which a collision would begin and end.

Seamlessness
Mapbox GL downloads vector tiles with data for the area and zoom level it is currently displaying. When new tiles are downloaded and their labels have been placed, an old tile’s label may need to be hidden to make way for a more important label. This will be handled in a resolution step that has not yet been implemented.
Mapbox GL
Look for future blog posts as we talk about more of the design and engineering work that has gone into Mapbox GL. Labels are just a small but necessary part of the bigger picture of what goes into high-quality custom maps rendered in realtime on the device.