By: Lauri Rustanius
This is the second part of a two-part series on how to procedurally generate world-scale AR experiences using the Maps SDK for Unity.
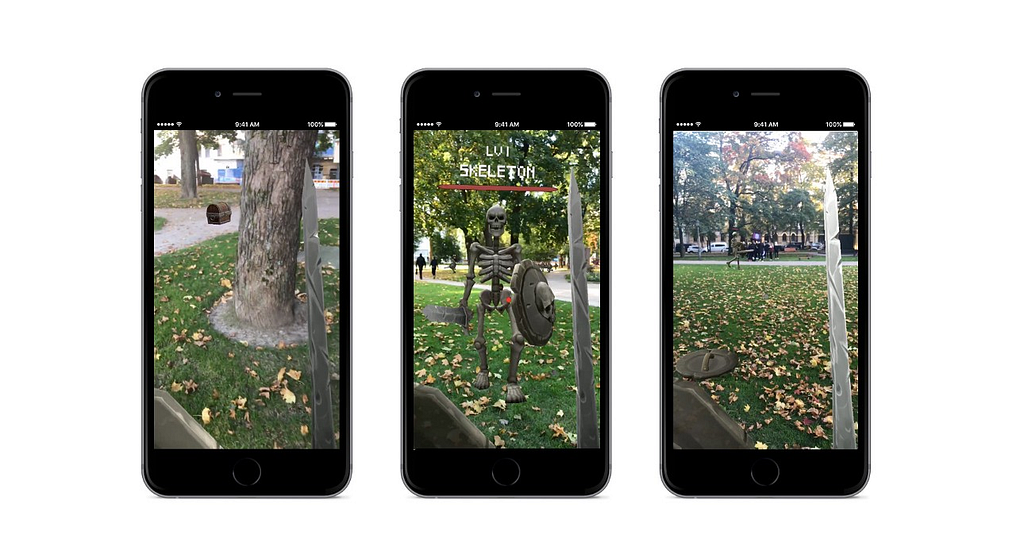
In part 1 we highlighted an example using the SDK to procedurally generate game characters in any location marked “park” in the world; we then made them follow park pathways until the player approaches for battle. In part 2, we show you how to do this yourself.
What we’ll cover:
- Setting up environment
- Creating an advanced map
- Setup scene
Let’s get going!
Setting up environment
We will be using components for the demo that require the experimental mapbox-arkit-unity build; this library is not the same as the standard SDK build. The repo comes with ARKit and runtime nav mesh components that are required to complete this tutorial. The tutorial also uses the latest SDK, v1.2. With the SDK, you can access not only maps, but also location intelligence metadata the lets you know things like “this location is a park,” “there’s a building here that’s 200 ft tall,” or “there is a grocery store 100 ft from you.” This data can be used to procedurally generate experiences at world scale.
Here is the completed tutorial. You will find the assets in the ParkTutorial folder.
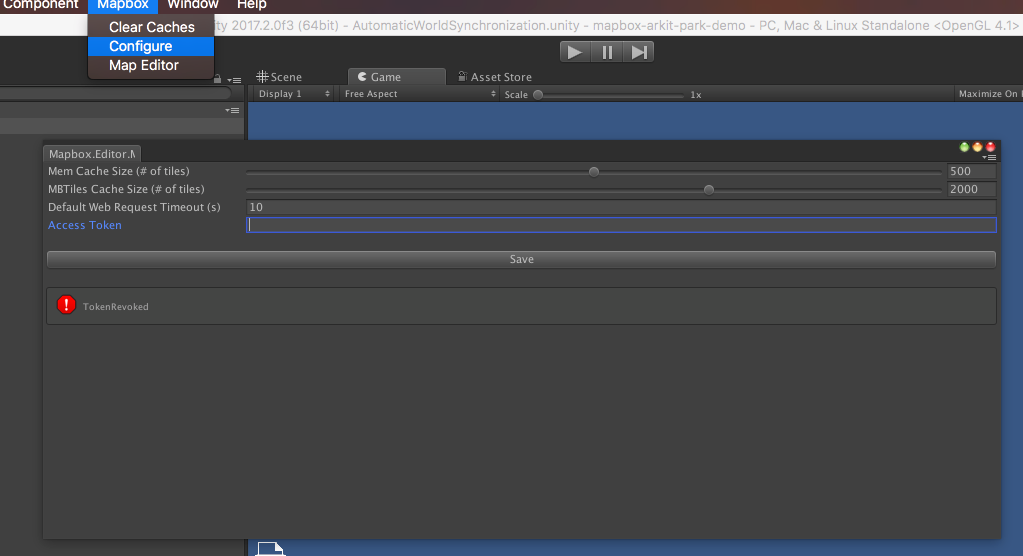
Remember to create a Mapbox Studio account; you will need an access token in Unity to fetch the map data. To activate a token in Unity go to Mapbox → Configure and paste the Access Token to activate it.
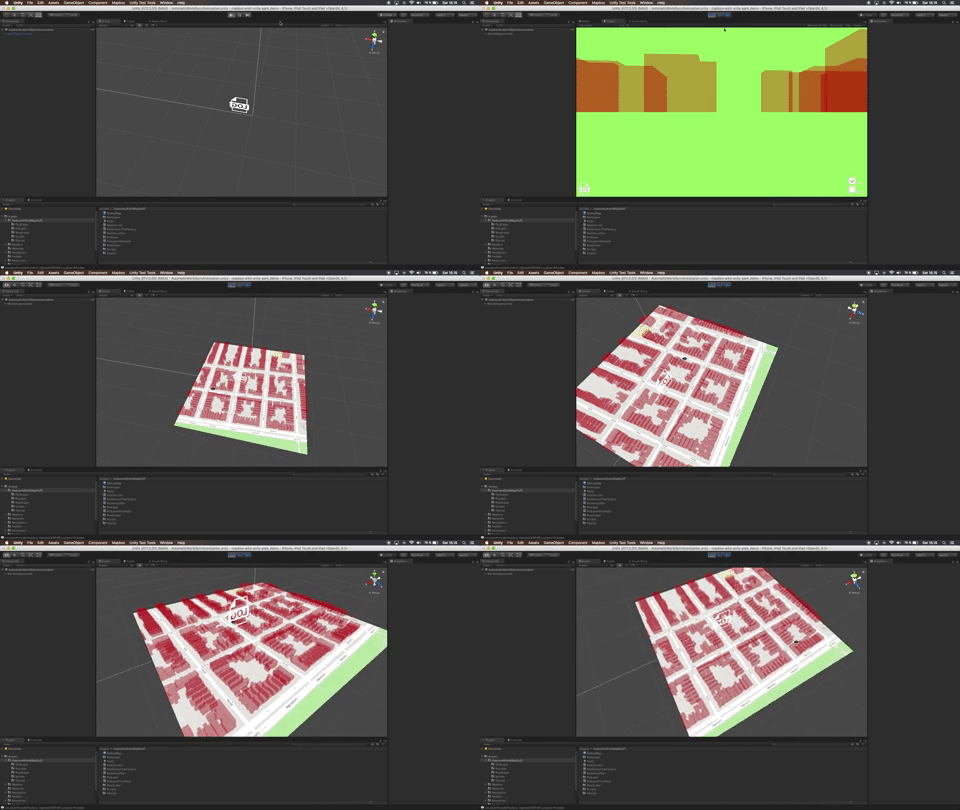
To make sure things are working correctly, open up the AutomaticWorldSyncronization Scene and hit Play. You can find the scene from Assets → MapboxARScenes folder.
Creating an advanced map
If you’re not familiar with the Factory setup in the SDK, please see this tutorial on how to create factories for maps. Here are the steps needed to create our custom map — it’s a long list, but don’t worry, I’ll walk through each step in detail.
- Create a Map Visualizer.
- Create 3 Factories. Flat Terrain Factory — Vector Tile Factory — Map Image Factory.
- Create 2 Vector Layer Visualizers for Vector Tile Factory.
- Create Modifiers for those two Vector Layer Visualizers.
- Add the Modifiers to Modifier Stacks.
- Assign the Stacks to Vector Layer Visualizers.
- Assign Vector Layer Visualizers to Vector Tile Factory.
- Assign Factories to Map Visualizer.
Let’s start with the Map Visualizer.
Map Visualizer
Basic Map Visualizer
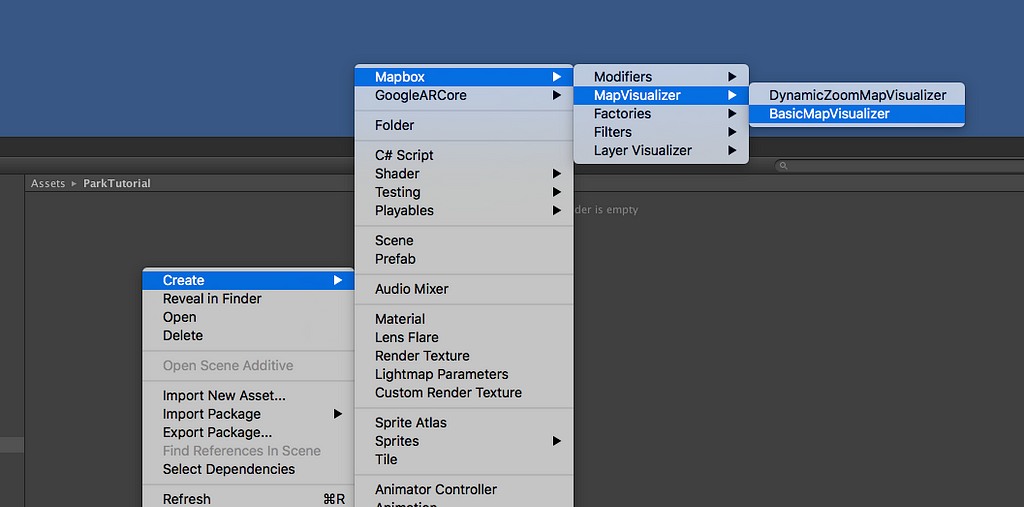
Make a folder named ParkTutorial. Then create a BasicMapVisualizer and name it ParkMapVisualizer.
Factories
Flat Terrain Factory
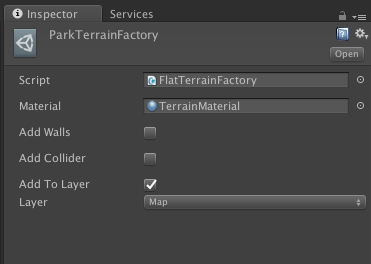
While still in the ParkTutorial folder do the same process as above to create a Flat Terrain Factory. Mapbox → Factories → Terrain Factory — Flat. Name it ParkTerrainFactory. In the inspector assign the ParkTerrainFactory to Map Layer. Add a Map Layer if there is none. Also add Terrain Material to the Material property.
Map Image Factory
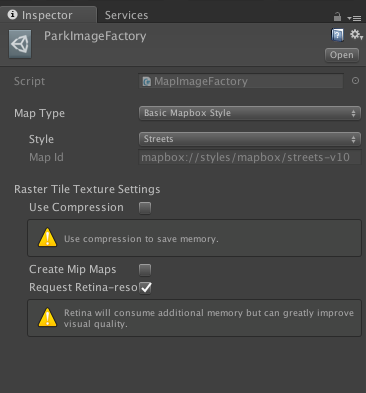
Create a new Factory Mapbox → Factories → Image Factory. Name it ParkImageFactory. Choose Map Style As Basic Mapbox Style and Style as Streets. Toggle Request Retina-resolution to get higher quality textures.
Vector Tile Factory
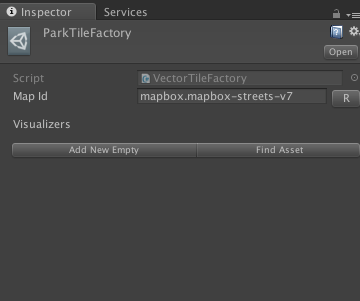
Create a Vector Tile Factory. Mapbox → Factories → Vector Tile Factory. Name it ParkTileFactory.
Vector Tile Factory will be holding all the Visualizers we need. Visualizers hold all the data we queue from Mapbox. If the Map Id is missing click “R” to add it.
Vector layer visualizers
We need to create two Vector Layer Visualizers for our map and their modifiers, but first let’s create two extra folders in the ParkTutorial folder. Name them RoadLayer and ParkLayer.
RoadVisualizer — Vector Layer Visualizer
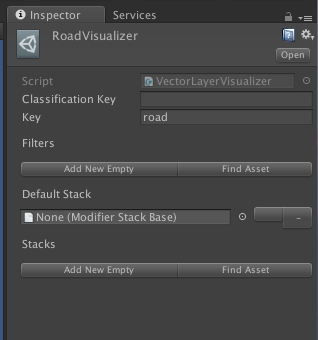
In the RoadLayer folder Create → Mapbox → Layer Visualizer — Vector Layer Visualizer. Name it RoadVisualizer. For the Key property in the inspector type “road” .
Modifier Stack for RoadVisualizer
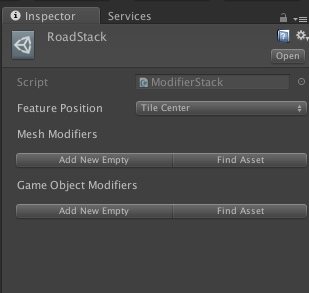
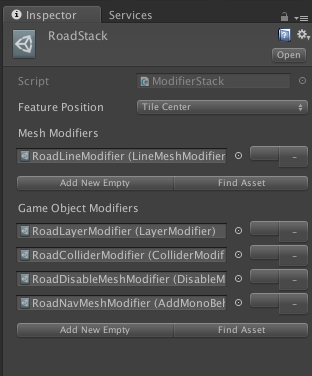
Next, Create → Mapbox → Modifiers → Modifier Stack and name it RoadStack. We will be adding all our Modifiers to this Stack for our RoadVisualizer. For now, let’s keep it empty.
Modifiers for RoadVisualizer
Time to create the modifiers we will be using in the RoadVisualizer.
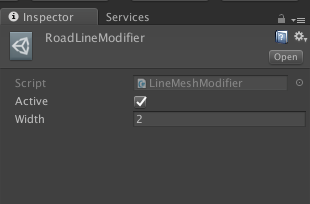
Line Mesh Modifier
Create → Mapbox → Modifers → Line Mesh Modifier. Name it RoadLineModifier. Add Width to 2.
Layer Modifier
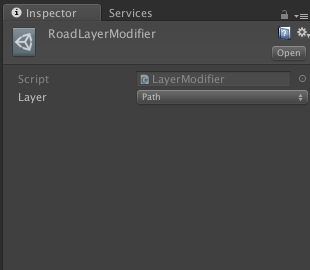
Create → Mapbox → Modifiers → Layer Modifier. Name it RoadLayerModifier. Assign the Layer Modifier to Path Layer.
Collider Modifier
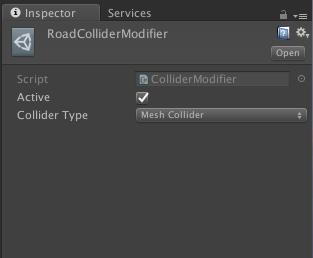
Create → Mapbox → Modifiers → Collider Modifier. Name it RoadColliderModifier. Make the Collider Type Mesh Collider.
Disable Mesh Renderer Modifier
Create → Mapbox → Modifiers → Disable Mesh Renderer Modifier. Name it RoadDisableMeshModifier.
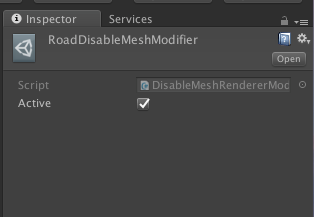
Add MonoBehaviour Modifier
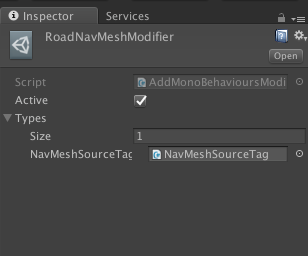
Create → Mapbox → Modifiers → Add MonoBehaviour Modifier. Name it RoadNavMeshModifier. Make the array size 1 and add a NavMeshSourceTag to it.
Add All Road Modifiers to RoadStack.
Next, assign all modifiers to the RoadStack we created earlier. After assigning everything it should look like this in the inspector.
Add RoadStack to RoadVisualizer.
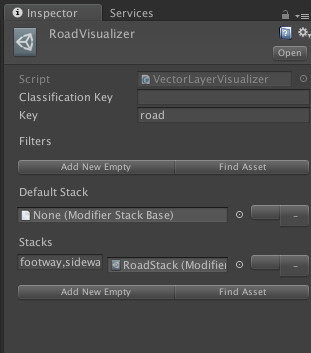
Open RoadVisualizer in inspector and click on Find Asset. Select the RoadStack from the module list. Next to the Modifier Stack type “footway,sidewalk,crossing”. The RoadVisualizer should look like this in the inspector.
ParkVisualizer — Vector Layer Visualizer
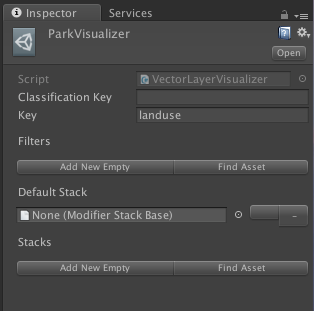
Go to the ParkLayer folder and create another Vector Layer Visualizer. Name it ParkVisualizer. For the Key type “landuse”. We will add the Modifier Stack later.
Modifier Stack for ParkVisualizer
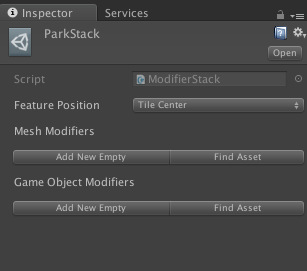
Create → Mapbox → Modifiers → Modifier Stack. Name the Modifier Stack to ParkStack. As usual, we will assign the Modifiers to the ParkStack later on.
Modifiers for ParkVisualizer
Time to create the modifiers we will be using in the ParkVisualizer.
Polygon Mesh Modifier
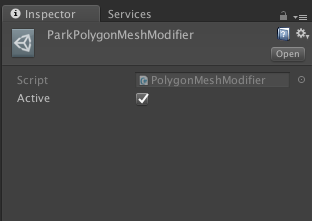
Create → Mapbox → Modifiers → Polygon Mesh Modifiers. Name it ParkPolygonMeshModifier.
Collider Modifier
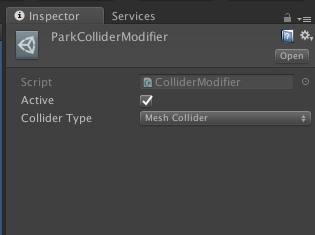
Create → Mapbox → Modifiers → Collider Modifier. Name it ParkColliderModifier. Make the Collider Type Mesh Collider.
Layer Modifier
Create → Mapbox → Modifiers → Layer Modifier. Name it ParkLayerModifier and assign the Layer to Park Layer. If there is no park layer made create one by going to the top right side and clicking the tab Layers → Edit Layers and then add it. Remember to assign it to the ParkLayerModifier too.
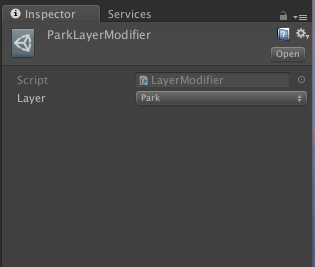
Disable Mesh Render Modifier
Create → Mapbox → Modifiers → Disable Mesh Render Modifier. Name it ParkDisableMeshRenderModifier.
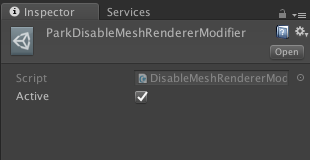
Spawn Inside Modifier
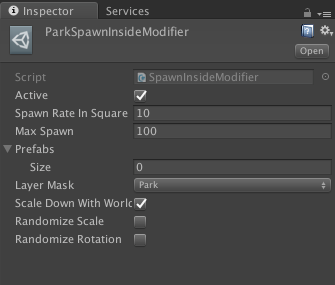
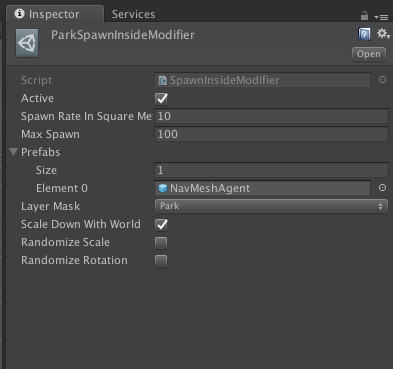
Create → Mapbox → Modifiers → Spawn Inside Modifier. Name it ParkSpawnInsideModifier. Set Spawn Rate In Square to 10 and Max Spawn rate to 100. Assign the Layer Mask to “Park“ layer. Set Scale Down With World to true.
We need to add the NavMesh Agent to the SpawnInsideModifier. There is a nice Player prefab in the ARKit folder, so let’s duplicate the Player prefab from Assets > UnityARInterface > Examples > Common > Models > Characters. Drag the Player prefab on to the scene. Rename it to NavMeshAgent.
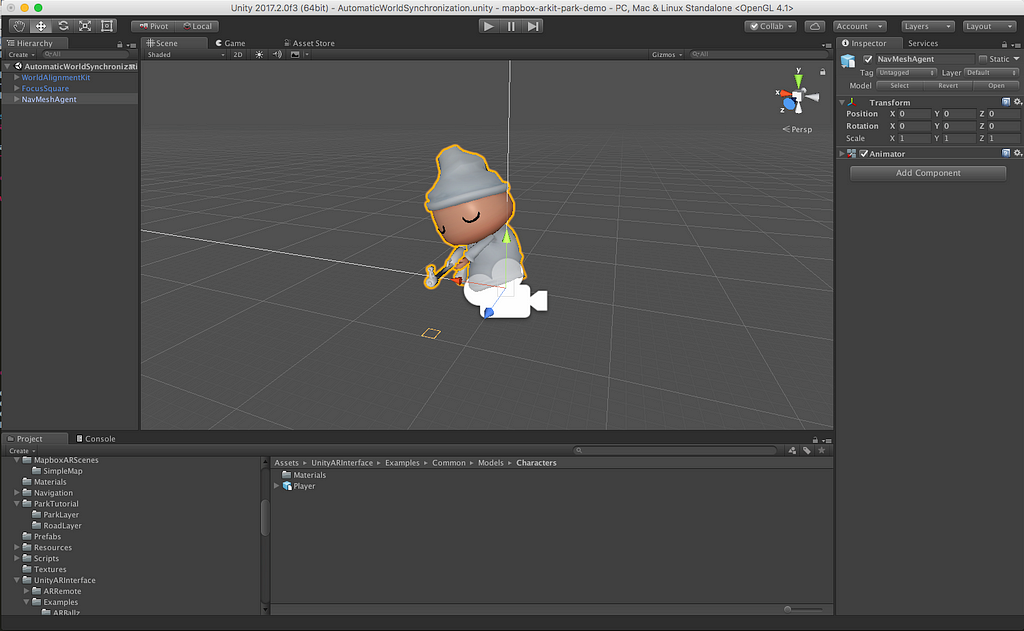
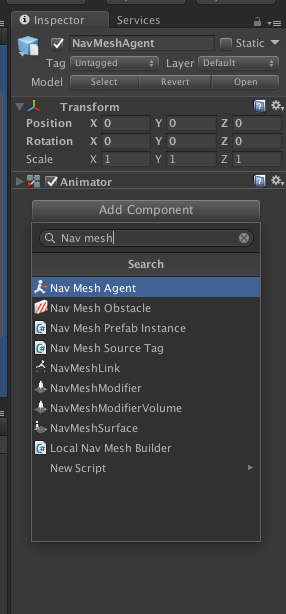
Select the NavMeshAgent gameobject and click the Add Component button from the Inspector to add a Nav Mesh Agent component to it by typing “Nav Mesh Agent” into the search bar and then selecting it. Assign the NavMeshAgent gameobject to AR Layer from the right top corner in the Inspector.
Finally a little bit of coding! Create a new folder in Assets > ParkTutorial and name it Scripts. In the Scripts folder create a new script and name it ParkElement.
The script raycasts down to the map and checks if the gameobject hits a path in the park. Otherwise it destroys the gameobject. That way we will have only gameobjects spawning in to the pathways inside the park.
We will also need to write a script to randomize the agents destinations on runtime. So create a new script in the Scripts folder and name it RandomizeAgentDestination.
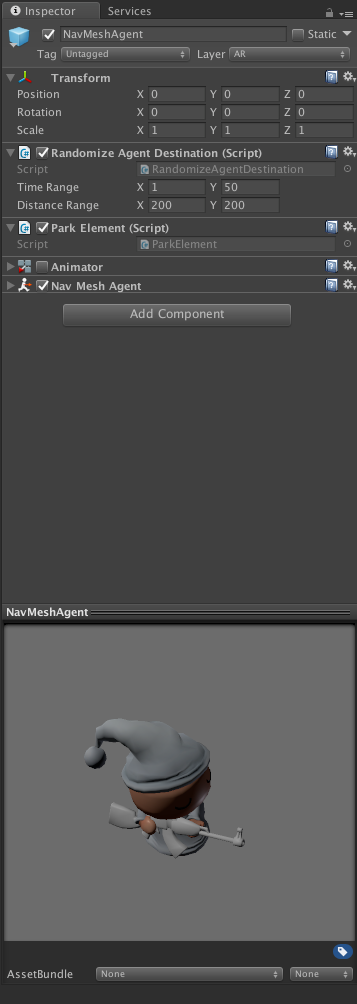
Add the ParkElement and RandomizeAgentDestination scripts to the NavMeshAgent gameobject and then drag and drop the NavMeshAgent gameobject to the ParkLayer folder. Finally add the NavMeshAgent to the ParkSpawnInsideModifier.
In the inspector of NavMeshAgent. Add to the Randomize Agent Destination values you wish. I added values on the to Time Range X: 1 Y: 50 and Distance Range X: 200 Y: 200.
Add All Park Modifiers to ParkStack.
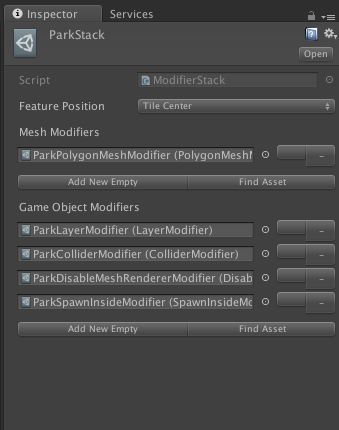
In Assets > ParkTutorial Click on the ParkStack to show the properties in the Inspector. Then click on Add New Empty to create a new slot for a Modifier. Assign the ParkPolygonMeshModifier to the Mesh Modifiers. Assign the rest of the modifiers to Game Object Modifier slots as seen below.
Add Modifier Stack to ParkVisualizer
Click on Add New Empty on the ParkVisualizer in the inspector and select the ParkStack from the select module list. On the Stacks write “park”.
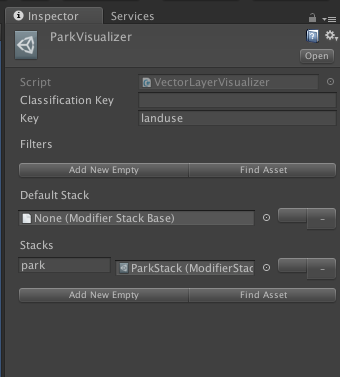
Assign Visualizers to Vector Tile Factory
In the Assets > ParkTutorial folder click on the ParkTileFactory. To create new slots for the Factory click on the Add New Empty button. Click on the Find Asset button and then select the ParkVisualizer & RoadVisualizer from the Select a module list.
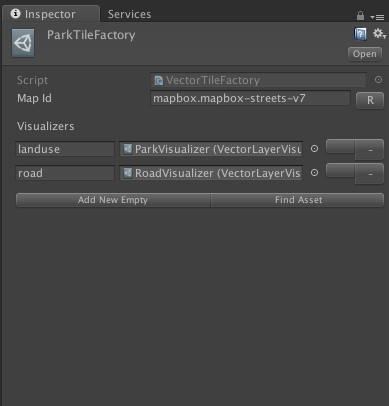
Assign Factories to Map Visualizer
Assign the ParkImageFactory, ParkTerrainFactory and ParkTileFactory to the ParkMapVisualizer in the inspector. Click on on the Find Assets and then choose the Factories one by one.
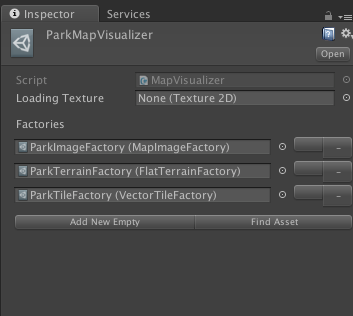
Setup scene
In the AutomaticWorldSynchronization scene go from the hierarchy to WorldAligmentKit → ArAlignedMap and change the Map Visualizer to ParkMapVisualizer. In the Range Around Tile Provider script assign the Target Transform to the Main Camera. Main Camera is located as child in AR Root.
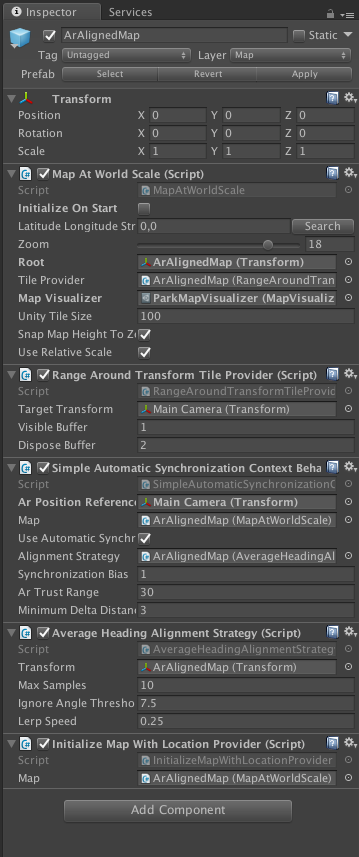
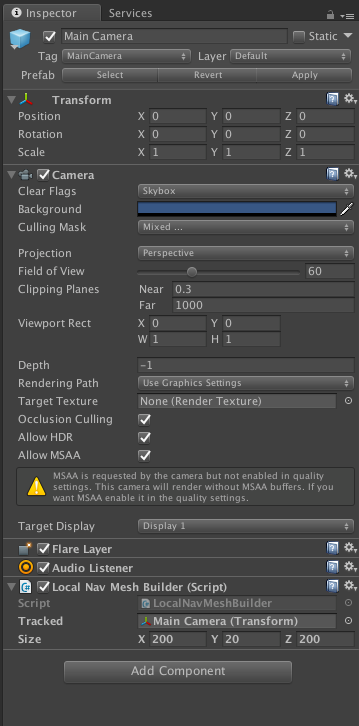
Add a Local Nav Mesh builder to the Main Camera in the scene.
Set It’s Size to X: 200, Y:20, Z: 200.
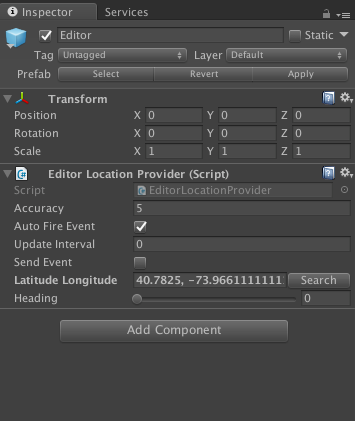
To set the map location to start at a park in the editor. Go to LocationProvider gameobject and select the Editor childobject and type copy these coordinates 40.7825, -73.966111111111.
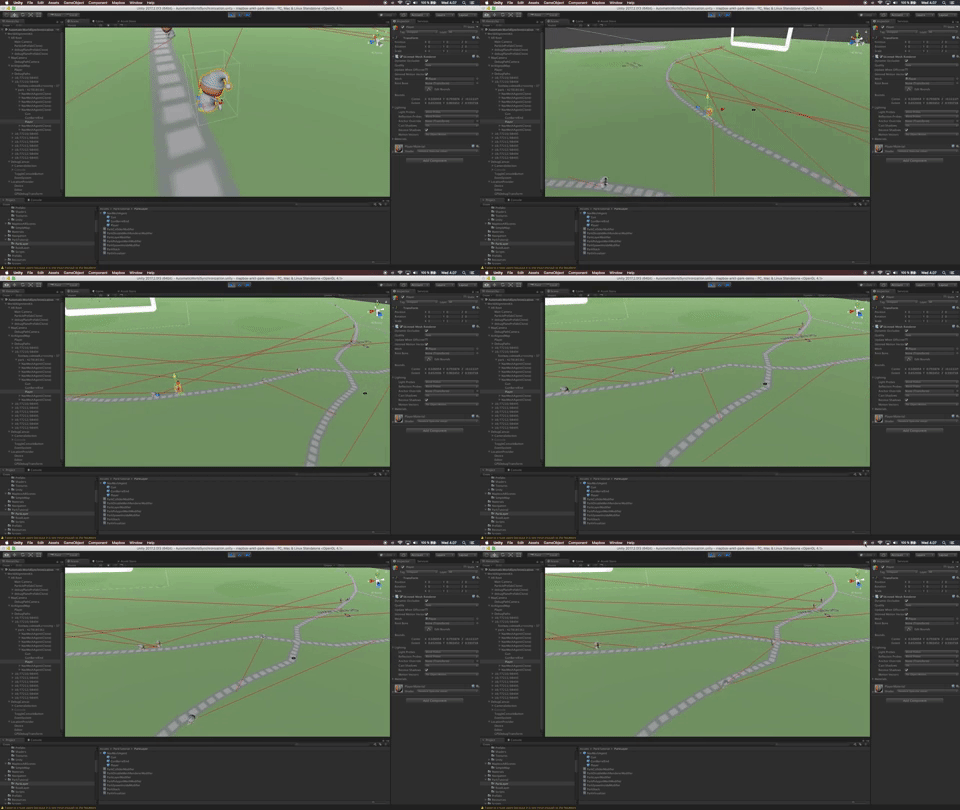
Voila! Everything should be set up. Press play and witness NavMeshAgents roaming in New York Central Park. If you move the AR Root gameobject around the map will update tiles accordingly.
Give yourself a pat on the back, you deserved it after completing this tutorial!
Keep building
Leverage geospatial data in AR/VR applications with the Maps SDK for Unity. Give this project a test run in AR and customize it to your needs. You can also create your own custom tilesets in Mapbox Studio that can then be accessed in Unity. Let us know what you build on Twitter with the tag #BuiltWithMapbox.
lauri (^ー^)ノ (@lingoded) | Twitter
Placing AR portals all over the world Pt.2 was originally published in Points of interest on Medium, where people are continuing the conversation by highlighting and responding to this story.